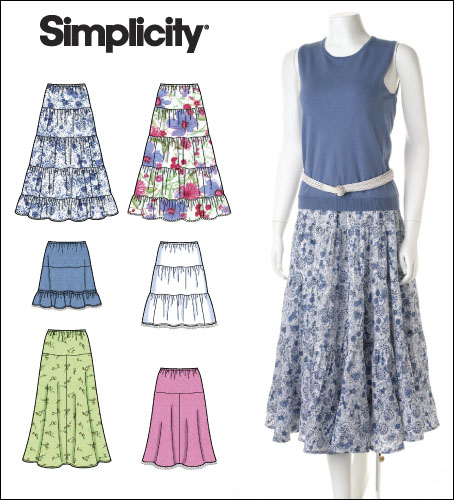
I made a blue floral skirt using Simplicity 2609 (View D).
The rayon I used was an experience! It would not hold its shape at all - either during cutting or layout. I probably should have used fusible interfacing on the elastic waist sections. Instead, I chose to underline it. The un

derlining helped, but the rayon was so stretchy that it puckered and sagged. It looked awful after final construction.
I finally cut the bottom edge of the underlining and loosely hand-stitched it to the horizontal seam to allow the fashion fabric to lay flat without puckering. It was much better, though not perfect.
I allowed the skirt to hang for a day before hemming. I'm glad I did because the stretch on the fabric became quite evident. Hemming such an uneven skirt was a chore. I have added this to my wish list: http://www.joann.com/joann/catalog.jsp?CATID=cat3423&PRODID=prd10486
I left the skirt long. This is one of those skirts that are soft, blow in the breeze and feels lovely while swishing. I would wear it tonight to a barbecue, but it is just a tad too cool today.
The other skirt I finished just last night. It is a pink paisley made in Simplicity 4881, view A.
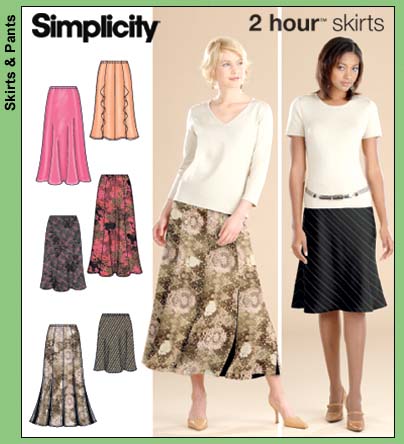
I wish I could report that this was a straight forward skirt to make. Even though I measured, it was too tight in the waist, so I had to cut off the elastic waistband, cut off another inch from the top, and FINALLY was able to slip the skirt over my hips. I unpicked an inch of side seams and hand stitched them to form the little gusset (perhaps gusset isn't the correct term) to accommodate the shape of the elastic. It wasn't difficult, just not "quick-n-easy." I sewed a lining, which I attached only under the elastic, and only sewed the side part-way down the side seams to allow movement.
I love this s

kirt. It doesn't look like much, but it is soft and has just the right amount of movement in the A-line.
Oh, almost forgot: I sewed the side seams in french seams. I think that's my new favorite seam technique! So easy to accomplish an so tidy and neat on the inside.


 (I had forgotten how much this fabric wrinkles. I had JUST pressed it.)