Sunday, November 15, 2009

Red Wool Skirt


That's not my belly hanging over the top of the skirt! It's just the unfortunate way I was trying to hold my top out of the way. (Really!)

I am pleased with this skirt, Simplicity 9825.

I trusted the measurements on the pattern and cut out the proper size (16) even though it seemed way too large. It fits like a glove. Which makes me wonder if I'm really that large!

The yoke is comfortable and sits perfectly, though I really thought I wouldn't like a skirt without an elastic waist.

I hand-picked the invisible zipper. It's not great. I'll need to get a picture of it to post later. I tend to insert zippers too high - I'll need to make a mental note to adjust that tendency next time.

The skirt is unlined, only because I didn't have any suitable lining (and didn't want to wait until I had the time to drive the 45 minutes to the nearest fabric store - Hancock's). I'll insert a lining next time.

I think I'll be making more of these skirts in a variety of fabric.

Sunday, October 4, 2009

Since my last posting, I have worked hard at making waders! Such discouragement! And that is why there have been no posts for so long.

I went to work figuring out why they were waders.
Mostly, I chose the wrong styles and colors.

Not all was lost as I learned a bit of technique.
I can adjust patterns to fit me - broad back, sway back, petite, fba.
I can make a pretty good dart.

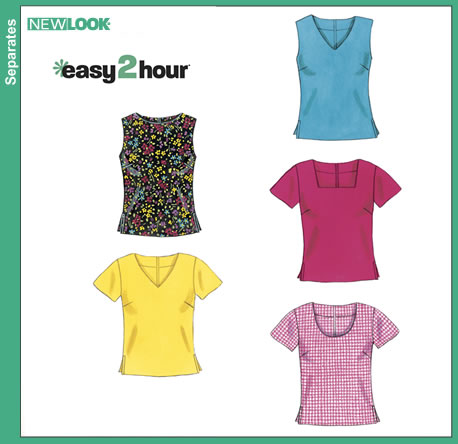
Here is a top which is not quite right, but not a wader: NewLook 6356, view A (which is the black floral). [Double clicking a picture enlarges it.]

This is a gauze top that fits fairly well. I had to tweak the neckline - to be a bit lower - and I should have excluded the zipper. I didn't realize gauze has quite a generous amount of stretch. That was a "duh" moment. The gauze is also too fragile to hold a zip - I should pick out the zipper and simply sew up the seam. (Think I'll do that this afternoon while football is on the telly.)


After this, I switched from sewing wovens to trying my hand at knits.

Knits!
Wonderful knits!
I've read that some people are afraid to touch knits.
But I'm having great success with them. This is probably due to the rather large FBA with small waist that I have. I need to gain experience and confidence to do what I need to do: pinch in that waist (so that I don't look like I'm wearing a moo moo).

I find that due to the stretch characteristic of knits, I don't need such a large FBA. A small bust dart seems to suffice.

I started sewing with cotton blend knits.

My first try was a cross over. Kwik Sew 2694, view A. I loved how easily this came together. After a couple of wearings - and after making a few other tops, I realized I needed to take in the side seams and did so. I also took in the underlayer of the crossover so that it fit more snuggly to avoid neckline gapping. Since this was my first knit, I used my standard large FBA. Such a long dart!

(I am just too lazy to iron and try on clothes right now!)


I ordered Pamela's Patterns "The Perfect T-Shirt" pattern. I exchanged a few emails with Pamela (such a sweet lady!) and she offered me a new DVD, which I see is now available on her website. I highly recommend this DVD for new sewers. Watching Pamela lay out the knit in preparation for sewing (while breezily chatting about what she is doing) was only one of the many helpful things Pamela includes in the lesson.

A white "Perfect T."

I made the version with darts. There is an undarted version for those who don't need a bust dart.

Compare the length of this dart with the length of the darts on the purple top above. Such a difference!

I took in the sides, as Pamela suggested in her instructions, and took the sides in again. You can't see from this picture, but the hemline has a beautiful and flattering feminine curve.


I tried a rayon/lycra blend - good success, but had a bit of skipped stitches so switched from using ballpoint needles to stretch needles. Less skipped stitches, but still not perfect. I'm wondering if it is due to my machine. I don't have a serger, so stitching is done with a very narrow zig-zag. I made this top in a "V" neck. I have worn this top several times.


My next project was Loes Hinse sweater set in white. I love the look of this set and the way the stitching plays a large part of the interest. I have to confess that I did not put any buttons on the cardigan....though I would like to put in just one buttonhole near the neckline. I've not yet made any buttonholes! The shell is too short in the front due to my FB. In future versions, I will add a couple of inches to the center front, tapering to the sides.


Here's my latest: I took Loes Hinse' sweater set, combined the shell with the cardigan, added a center back seam (to adjust a sway back), and made a deep "v" neck pullover with a 3/4 inch sleeve. This fits beautifully except that the darts can use a bit of adjusting. I will be making this top in a variety of fabrics with several tweaked effects.

As I was writing this blog post, I noticed on Loes' website a "V Neck Tunic." My tunic. The one I spent hours making a pattern for.

Well, now I know I can. I can imagine and make it reality.

My basic sewing techniques include:
- I use a narrow zig-zag for seams
- I use Steam-a-Seam Lite for turning neckline seams and sometimes on hems
- I use stay tape stabilizer on shoulder seams (being sure to sew it to the back shoulder piece because I find it itchy if it contacts my skin)
- I use stretch needles
- I take my time. My attitude has shifted from "hurry, get this done" to "enjoy the process." This has made a huge difference in producing successful garments. I'm glad I learned this early in my sewing renewal.

I have spent hours watching online tutorials and reading sewing blogs. The generosity of those who take the time to teach others is amazing! Videos which show the sewist handling fabric at the machine has helped me tremendously. Thank you all!

Friday, July 3, 2009

Long Purple Skirt Now Restyled

BEFORE:


AFTER (I had forgotten how much this fabric wrinkles. I had JUST pressed it.)


In addition to shortening the skirt, I had to take it in from the back and side seams. Taking it in from the back was a chore because of the elastic back waist. It doesn't look 100%, but I will enjoy wearing it with an untucked top.

Thursday, July 2, 2009

June Top

I made this top: Vogue 8495, View A, using a white cotton I bought at G-Street. It has a wee stretch, which is so comfortable, so I used a very slight zig-zag stitch to accomodate the stretch. This technique worked very well, though I was skeptical at first.


I added an inch to the back and front width after making a muslin. I need to figure out how to choose the correct size pattern. It might be the correct thing to use the size I do (based on upper bust measurement) and add that extra inch. I don't know at this point. Adding the inch certainly made the neckline a tad too large.


I made an FBA using the original technique I learned. The bust dart is L.O.N.G at 6 1/2 inches from side seam to point. I have since found an alternative method of forming the FBA which I will use in a future project, which should cut down on the length.

I had to tweak the top of the bodice: the bust darts sat too low on my chest. I unstitched the basting at the yoke line and hitched up the front bodice about half an inch. It took away the pull across the bust and now the bust darts sit where they belong.

Also in my learning curve was the need to unpick the armholes. I had neglected to clip the curved seams and so the seams sat all wonky.

I used a stretch stitch to finish the seams which worked out very well. I also worked on my dart formation technique. I think I did fairly well. I cut off much of the seam allowance - it was very deep - then I finished it up to an inch or so from the point using the same stitch as I used for the seams.

Two Skirts

I made a blue floral skirt using Simplicity 2609 (View D).


The rayon I used was an experience! It would not hold its shape at all - either during cutting or layout. I probably should have used fusible interfacing on the elastic waist sections. Instead, I chose to underline it. The underlining helped, but the rayon was so stretchy that it puckered and sagged. It looked awful after final construction.

I finally cut the bottom edge of the underlining and loosely hand-stitched it to the horizontal seam to allow the fashion fabric to lay flat without puckering. It was much better, though not perfect.

I allowed the skirt to hang for a day before hemming. I'm glad I did because the stretch on the fabric became quite evident. Hemming such an uneven skirt was a chore. I have added this to my wish list: http://www.joann.com/joann/catalog.jsp?CATID=cat3423&PRODID=prd10486

I left the skirt long. This is one of those skirts that are soft, blow in the breeze and feels lovely while swishing. I would wear it tonight to a barbecue, but it is just a tad too cool today.

The other skirt I finished just last night. It is a pink paisley made in Simplicity 4881, view A.


I wish I could report that this was a straight forward skirt to make. Even though I measured, it was too tight in the waist, so I had to cut off the elastic waistband, cut off another inch from the top, and FINALLY was able to slip the skirt over my hips. I unpicked an inch of side seams and hand stitched them to form the little gusset (perhaps gusset isn't the correct term) to accommodate the shape of the elastic. It wasn't difficult, just not "quick-n-easy." I sewed a lining, which I attached only under the elastic, and only sewed the side part-way down the side seams to allow movement.

I love this skirt. It doesn't look like much, but it is soft and has just the right amount of movement in the A-line.

Oh, almost forgot: I sewed the side seams in french seams. I think that's my new favorite seam technique! So easy to accomplish an so tidy and neat on the inside.

Friday, June 5, 2009

Purple Dress Sewing

I've been ignoring my blog because I was hoping to report glaring successes. Since I can't report glowing successes, I think I'll settle for recording.

Here's a bit of something I wrote at the beginning of June regarding the purple dress I was in the process of mmaking:

I spent most of the last few weeks reading up on technique. What intrigued me most were those who spoke about basting: basting an underlining to the garment, basting a dart, basting a seam....basting and more basting. Unanimously, these basters reported much improved garments because they took the time to hand or machine baste.

Updated Today: I have to say that in the last month, I have basted quite a bit. Not only has my technique improved, but the look of the finished garment as well. Basting is now a top priority in my construction.

In the photo you can see where I basted the white underlining to the fashion fabric.


In my research, I find that hand-sewing is also high priority for those who produce lovely garments. Some go so far as to hand-sew whole garments, as do couture houses. My skills need improvement and/or education before I consider such an option, however, I have noted the need to hand-sew during the construction of a garment.

Updated Today: I am using hand-sewing more and more. I find that I can make fairly even small stitches, which makes me wonder if I'll attempt to hand-sew a whole garment. I feel that I have more control over the fabric, seams, piecing than when I use the machine. I find I enjoy the time I spend quietly hand-stitching.

My purples dress (for which I was fitting my first FBA a few weeks ago) is seeing me use both of the above techniques rather extensively.

Updated Today: Ah. The purple dress. An utter and complete failure!

Well, maybe not utterly because I learned.

First, I learned about underlining:

I basted the bodice underlining to the fashion fabric. I love the technique. It has stabilized a very weak rayon to the point that it's hand feels the stability I was hoping for. The white underlining also brings out the color in the fashion fabric - making vibrant the brilliant, bold red, dark purple, yellows and bits of white within the pattern. The underlining also seems to prevent many of the wrinkles the fashion fabric was prone to when standing alone.

And I learned a bit about making darts in underlining: unfortunately, I later read that it is unnecessary to sew a dart in the underlining - thereby reducing bulk. (Note to self: I do hope I saved the techinque for future reference!) Here's record of my purple dress attempt:


I
hand-basted the darts and handled the underling and fashion fabric as if they were a solid piece. I basted a center line, then basted the dart closed.

Update Today: The darts came out very well. I had made several muslins and adjusted the darts until I was satisfied with the angle and placement. Not bad at all for a first FBA.

This dress has neck and armhole binding. I followed the pattern directions when making the neck binding. I edge stitched one side with a three-part zigzag, which after attaching the binding, looked horrible, even if it is on the inside of the garment. So I decided to try hand stitching the armholes and this looks so much neater without the raw edges. It is also much nicer on the outside of the garment as I was better able to control the bias binding. Since this technique worked so well, I re-did the neck binding.

Here is the re-stitched neckline:


Update Today: That is as far as I recorded my purple dress' journey. After that, it went downhill....I had such a difficult time with the waist sash....the FBA made the bodice wider than the original pattern. I adjusted the bodice by adding waist darts - which came out fairly well for a first attempt. While I was aiming for perfectly vertical, I missed the mark, yet they look presentable:
But I could not get the side seams to line up no matter how much I measured and ripped stitches and re-sewed. I tried gathering the skirt, darting the skirt, gathering the bodice...

Narrowing the bodice via the darts, also made the dress impossible to slip over my head. I decided to add a side-zipper. But first, I need those side seams to match up!


I put this dress aside for now. I was getting discouraged and needed to sew something with positive results.

I would like to revisit this dress at some point as I think I'd love to wear this particular dress, even if just for an "at home" day.

Friday, May 15, 2009

Repurposing verses Restyling

I need to learn sewing terminology.

Evidently, my plans for my purple skirt are to restyle it, not to repurpose it. sdBev was kind enough to explain the difference to me on The Stitcher's Guild Forum: What you're describing, and everyone else is picking up on, is restyling, like updating the look, but retaining the original intent i.e. it was a skirt and will continue to be a skirt.

While I love satchels and never seem to have enough of them (anyone relate?), I just cannot imagine my purple skirt becoming a satchel. Or a wallet. Or even a top.

So my skirt will be restyled into another skirt. Ideas are swirling. I need to gain the courage to pick up the scissors.

However, if there are enough remnant remains, I will repurpose them into trimmings for a top.

Thank you, Bev!

Wednesday, May 13, 2009

Repurposing Old Long Skirts into Short Cute Creations

[double clicking on a photo will enlarge it]

I love to wear long and flowing hippy skirts. I am a child of the 60's and 70's when long hippy wrap skirts and embroidered peasant blouses were the rage. Oh, how I loved to wear those clothes! I love to feel the swoosh of soft summer fabric around my ankles. They remind me of carefree days playing frizbee in DC under cherry blossom trees. I've been deliriously happy these last few years since broomstick skirts have been in vogue. I hit the mother lode last summer in Lake Placid, NY, where I found a store filled wall-to-wall with these skirts!

Two weeks ago, I found myself in a small boutique where a little green dress caught my eye. The soft cotton fabric was light as air. The styling was unique. I was drawn to this dress like a magnet - I kept walking away from it and going back to rub my fingers over the softness. My astute friend convinced me to try it on and I eventually gave in to her urging even though it was a very short dress, falling above my knees instead of my mid-calf or ankles. I haven't worn a short dress in many years. I don't feel I have legs or figure to "show off" and like to feel hidden behind the acres of yardage a long skirt provides. But when I tried on that dress, perfection! I guess swimming several times per week has expelled my formerly frumpy figure. What a lovely surprise! My legs didn't look tubby (nor my arms as this is a sleeveless dress). I didn't recognize the woman in the mirror. Needless to say, I'm eagerly awaiting an occasion to wear my dress.


Since then, I realized I could shorten a few skirts in my closet which I love but do not wear. One is (was) a very long A-line jean skirt that is just too long and HOT in the warm weather. Besides, it looks ridiculous on me. I don't know why I have kept it. Why I packed it to come south with me this summer is equally a puzzle as I know I never would have worn it. I cut off a good 8 to 10 inches from the hem. I've worn it several times - ok - almost every day - I just love the way a short skirt makes me feel 20 years younger.

I just measured: 12 1/2 inches was cut off the length.


I spied a little skirt in a ski shop this weekend while looking for a windbreaker for my husband (good man has taken to walking several miles in the evenings, rain or shine). The price was right and so I had to have it.

I realize this is a sewing blog and I'm posting about retail purchases. These purchases have given me a vision for what I want to be sewing and how I want to build my wardrobe. They have helped me define a new style that works for me.


This purple floral skirt has been a long-time favorite. I reach for this at the first sign of spring. But it no longer fits in size or style. I'm determined to keep this skirt alive via alterations, yet I'm in a conundrum as to just how to alter it. I've played with a few ideas and have discarded them all. Simply shortening it and adding an elastic waistline won't work as the waist will be too bulky and the button-down front will be funky (cutting off the slit below the last button). I could cut it from the waistline, but it would still be too wide. I think I'll draft an A-line pattern with zipper opening and forget trying to incorporate the button front. I'm open to suggestions.

After that alteration, I'll need to rethink the yardage I bought intending to make long, flowing skirts.

I wore a long, full eyelet lace skirt the other day and felt like a princess (I bought this at the aforementioned boutique - this $200 skirt was on sale for $25!). There is a place for a long skirts in my wardrobe, but I'm being drawn to the spunky short ones moreso. Odd that.

Friday, April 24, 2009

Shortened Tango

[Edited to change the picture!]

I shortened the Tango skirt. I don't think this picture shows the difference as well as real life. It feels so much better shortened.


I've only worn really long, hippy-style skirts for years and years. Wearing a short skirt is new to me. The Tango was a bit too long, making me look (and feel) frumpy.


One thing I must do: stop taking pictures late at night, when I look so worn out and tired.


Hard to imagine that just one week ago I was rushing my son to the hospital for what turned out to to be an emergency appendectomy. I'm thankful that all turned out so well. So many things came together (including him being here with us instead of 14 hours away at college) for his good (as well as being the only one in the emergency room last Friday night!).


Unless my daughter needs an emergency appendectomy tonight, I'll be sewing muslins tomorrow, working on a variety of FBA's, while the guys watch the football drafts.

Friday, April 17, 2009

Remnant's Rumbles

Today I hiked up a wooded knoll, enjoying delicate wildflowers in yellows, purples, white. It was a beautiful spring day spent with new friends.


Spring has put me into a mood for light and flowery material. I found myself in Tennessee yesterday, where there is a Hancock Fabric shop. I found several fabrics to satisfy my cravings. Joys!


These will probably be skirts.


And this might be a skirt/top combo of some sort.
I really didn't want to iron so I'm posting
crinkled. (I should have more pride!)


Thursday, April 16, 2009

Full Bust Adjustments

I have been depressed since I posted the last blog entry. The pictures I took of myself in my new tango skirt did not at all look like the mental image I had of myself. Can you relate?


In my mind, I'm more svelt. I'm more toned (after swimming three times a week for a few months). My hair is perky and cute.


Reality says otherwise. Or maybe I'm just not photogenic.


When I sat down last night to make my very first FBA (full bust adjustment) on a pattern, I had several tutorials opened on my computer. I took measurements and decided I needed to spread my pattern an inch and a half! In all the FBA's I've seen photographed on sewing blogs, I've never seen one so large! One tutorial said if you need more than an inch, you should make two separate slits to take care of the full bust.


To say I went into a tailspin would be an understatement. I did complete the FBA and made a muslin and it did fit in the bust (but not in the back - so I think I need to consider making a sway back adjustment as well). I'll write a post later on about the actual sewing of it - this post is dedicated to my angst over my body image.


Today, I visited a foundations store a few towns over from here. Let's just say that my need to expand the pattern by 1 1/2 inches was not an error in my math. It was quite a learning experience, but needless to say, my full bust has made some dramatic adjustments after the visit.


Although it's been a full day, and I look as tired as I feel, I'm happy with the effects. Oh, sew happy!

Sunday, April 12, 2009

Tango, anyone?

I completed a garment! And I'm very satisfied with it.

I made Loes Hines' Tango Skirt (#5010) in a teal floral rayon which I found at Hancock Fabrics in Kingsport, Tennesee. You can't really tell from the photos, but this skirt swings so beautifully (as those who have made it attest). The movement of this skirt is unique and very feminine.

(I took the picture using a timer....I'll have to work to find a better angle to use but I did want to post a pic tonight.)

I took the advice of several ladies at the Stitcher's Guild Sewing Forum and made a muslin. I'm glad I did because I realized that I needed to be quite a bit more careful and deliberate with my cutting. I was tempted to zip through the cutting because the pattern pieces were simple and the same piece was repeated so many times (5 times, double layered for a total of 10 gores). I also realized I don't have as much cutting control using the rotary cutter as I do with a scissors, so I'll be sticking with scissors from now on.


The muslin fit well so I didn't need to make adjustments to the pattern for my fashion fabric. I didn't bother to finish the muslin waistline as the skirt is finished with a simple elastic technique. I really needed to make sure the skirt would fit my hips. Sewing the muslin had the added benefit of helping me adjust to the feel of the new machine.


I originally thought I'd need a lining, but decided my fabric didn't need one. Summers here in southern Virginia are HOT and I thought a lining would prevent me from wanting to wear this skirt in July and August. Without the lining, it is lightweight and cool.


I liked Loes' method of attaching the elastic. The elastic is sewn directly to the raw edge of the waistline, then both the elastic and waist are folded over and stitched again, rather than making a casing and inserting the elastic afterwards. I just might use this simple method again. And again.


This close-up was depressing as I realized how ill-fitting my favorite white linen jacket is. I think I'll work on shortening the sleeves.

I envision this skirt with a sheer fashion fabric and coordinating lining for formal events. I'll keep an eye out for something to use for this effect.


I took my time and enjoyed the process rather than rush from one task to the next. I love to see an idea come to fruition.


Sew satisfying.

Thursday, April 9, 2009

Settling-In Photos


I had a sweet chat with a couple of women at my College for Older Adults class I attended today on Health Topics (today's topic was hypertension). They invited me to the Newcomer's Club which meets next week. I'm starting to like this area. After yesterday's class when no one spoke to me, I was relieved to find friendly folk today. This area has a plethora of unusual activities.

Speaking of area: here are a few pictures of my sewing area.


Here's a close up of the sewing corner. I found the little sewing machine table at Walmart as well as the ironing pad. Notice that I set myself up with the best view outside. Once a week, there will be cattle a mere 10 feet off the deck.


Cattle field.


Oh, wait. Can't forget the pets. Murphy the Cheweenie (mother was a tea cup chihuahua, father a miniature daschund. Latte cat.

Not too bad for a temporary home.