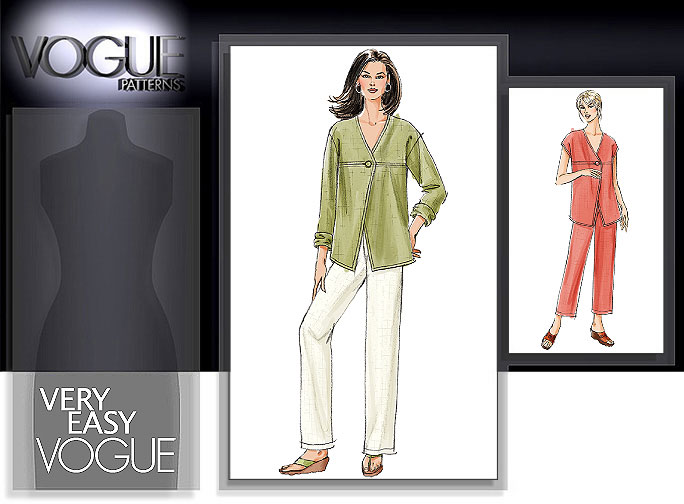
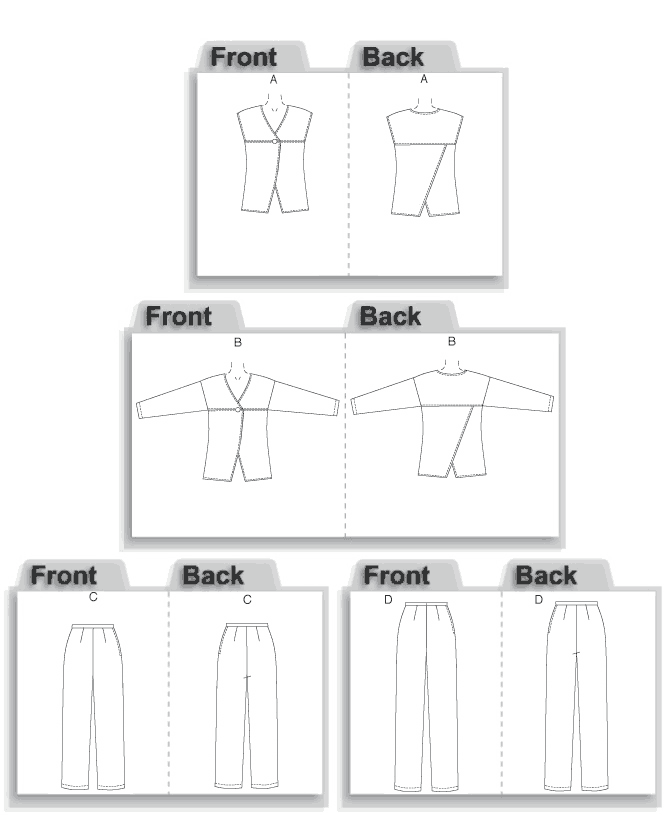
Originally I was hoping to make this into a white linen, summery cover-up. When reviews said it was quite loose, I thought I ought to play a bit with it to see if the finished pattern would be to my liking. Here’s the pattern and line drawing:


I don’t know what happened, but I pulled out this grey burnout…
which may have come in a Fabric Mart bundle. And Kati Koos became inspiration for something a bit Bohemian. The design started out with the bodice ruffle, morphing slowly over the course of a week. As the week progressed, I bid adieu to my son after he graduated college and moved state to pursue a career, moved my sewing studio from my bedroom to his newly vacated one, then welcomed home my daughter from her junior year of college, having to nurse her back to health when she developed a fever right away due to romping barefoot at night in the rain after her final exam. It has been quite an emotional week.
I took the front bottom piece, traced it off, cut slashes every inch and spread. Then I traced out a new piece. Here you can see the original piece atop my expanded piece.
I further increased the top seam allowance by 5/8 inch in order to fold the ruffle. I would have serged the raw edges if I had had a serger.
After gathering the ruffle, I laid the fabric atop the original piece in order to bring the gathering back to the proper size so that the top front bodice could be attached . There was a question about how I would treat the back, but in the end, decided the only thing to do is follow through the design to the back rather than sewing the back as the original draft pattern.
Adding ruffles to a pattern that starts off as wide, well, I’m not sure how wise. I trimmed off quite a bit.
Side seams were finished using French seams. Seams that could not be enclosed were finished with edgestitching and pinking using my rotary blade pinker.
Side seams needed a bit of something Bohemian to tie in with the theme. After considering several methods, I decided to simply use elastic to add a small bit of gathering. Also, leaving the side seams open at the bottom for several inches and the hem uneven (don’t know how that happened, but used that error as a design feature) – the back is longer than the front.
Shoulders presented a bit of a challenge. In the end, I took a pleat in the shoulder because I didn’t like the drop shoulder on such a light weight fabric. I also took a wee tuck an inch behind the shoulder seam. Making a Bohemian-like top allows for tucks, pleats, elastic responses to fitting issues while adding to the design concepts.
The final design element was to forego the use of a button in favor of ties finished off by little silver doodads I found at the local bead shop.
I have no idea how I’m gong to style it. I originally hoped to wear it with the TableCloth skirt, but think the proportions are off. I’ll try them on together and post better photos in the next days. I think I need to make a Kati Koos inspired top to enhance the look.


2 comments:
What a great top you've produced. I really like what you've done with it.
Marcia
Wow - such an interesting process. Thanks for posting the steps as well as some of your thinking. You have an original design here. And it is wonderful. The little silver pieces finish it perfectly!
Thanks to for the reference to Kati Koos. I had not heard of this shop and though I haven't been to SF in years, this shop alone looks like it warrants a trip. What fabulous designs they feature!
Post a Comment